InSync facilitates you create customized Patient Forms so that any common or patient specific information can be collected directly from InTouch Patient Portal user. All you need to do is create forms and send those forms to the patient portal for recording.
Configuring Patient Forms
| 1. | From the left menu items, click Administration > EMR > Form Builder. |
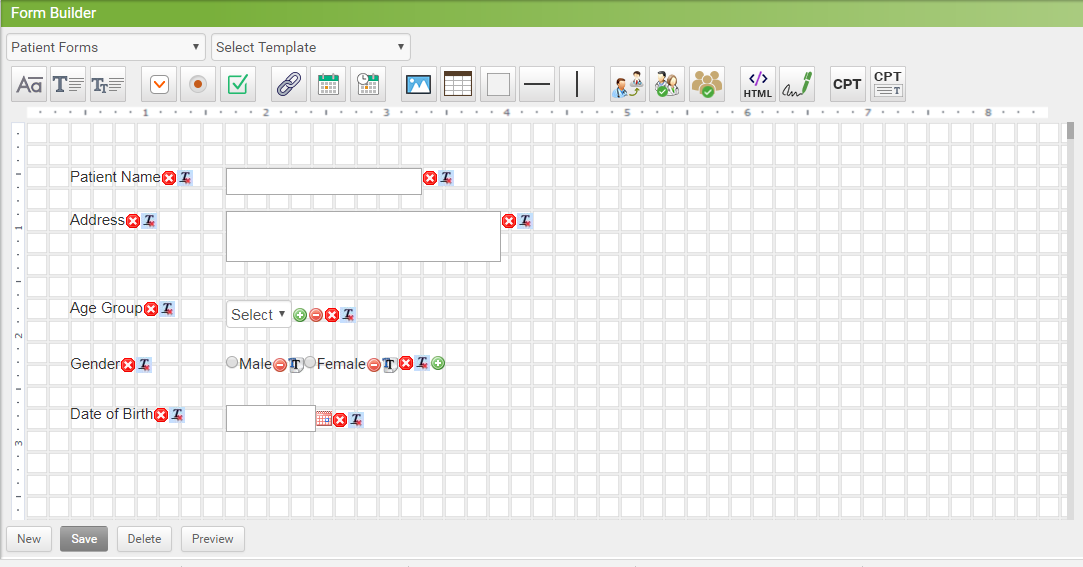
| 2. | Select Patient Forms from the category drop down. |
| 3. | Using the drag and drop controls create form for the Patients, below listed are the toolbar controls: |
|  : This icon represents the Label control. For example, Visit Date. : This icon represents the Label control. For example, Visit Date. |
|  : This icon represents the Text box control. : This icon represents the Text box control. |
|  : This icon represents the Multi-lineText box control. For example, Address. : This icon represents the Multi-lineText box control. For example, Address. |
|  : This icon represents the Drop Down control. : This icon represents the Drop Down control. |
|  : This icon represents the Radio Button control. For example, Male or Female. : This icon represents the Radio Button control. For example, Male or Female. |
|  : This icon represents the Check box control. For example, Male or Female. : This icon represents the Check box control. For example, Male or Female. |
|  : This icon represents the Link control. For example, Click here. : This icon represents the Link control. For example, Click here. |
|  : This icon represents the Date Picker. : This icon represents the Date Picker. |
|  : This icon represents the Date-Time Picker control. It enables you to enter both date and time. : This icon represents the Date-Time Picker control. It enables you to enter both date and time. |
|  : This icon represents the Picture control. : This icon represents the Picture control. |
|  : This icon represents the Table control. : This icon represents the Table control. |
|  : This icon represents the Rectangle control. : This icon represents the Rectangle control. |
|  : This icon represents the Horizontal Line control. : This icon represents the Horizontal Line control. |
|  : This icon represents the Vertical Line control. : This icon represents the Vertical Line control. |
|  : This icon represents the Referring provider control. This control automatically pulls all the referring provider names. : This icon represents the Referring provider control. This control automatically pulls all the referring provider names. |
|  : This icon represents the Provider Selection control. This control automatically pulls all the provider names. : This icon represents the Provider Selection control. This control automatically pulls all the provider names. |
|  : This icon represents the User/Staff Selection control. : This icon represents the User/Staff Selection control. |
|  : This icon represents the HTML control. It enables you to enter your own HTML script for the form. : This icon represents the HTML control. It enables you to enter your own HTML script for the form. |
|  : This icon represents the Signature control. It enables you providers or patient's signature. : This icon represents the Signature control. It enables you providers or patient's signature. |
|  : This icon represents the CPT control. This automatically pulls all the CPT codes recorded in the system. : This icon represents the CPT control. This automatically pulls all the CPT codes recorded in the system. |
|  : This icon represents the CPT Text control. This control enables you to enter any text along with the CPT code. : This icon represents the CPT Text control. This control enables you to enter any text along with the CPT code. |
Key points to know while Sending Patient Forms
| • | Patient forms can only be sent to the patients who have registered for InTouch Patient Portal. |
| • | Patient forms can also be sent to patients who were quick registered. |
| • | You can send the patient forms all at once to all the current and future patients. |
Sending Patient Forms To Patient Portal
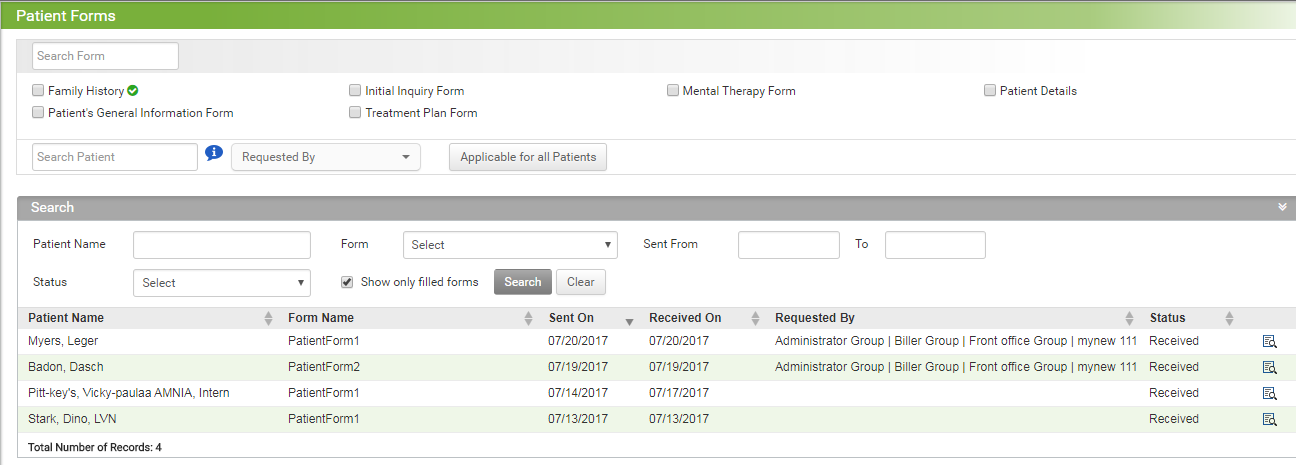
1. From the left menu items, click Patients > Patient Forms.
2. You can start typing the form name in the search box or just select the forms from the displayed list.
Note: This  icon appears only for the forms which are supposed to be sent to future patients. You can click on the icon to prevent it form being sent to future patients.
| 3. To send the selected forms to specific patient just type in the patient names one by one. The selected patients will be added to the 'Selected Patients' pop up, once done, click Send. |
| Note: Once the form is sent, the patient will receive an e-mail notification to fill up and submit the forms. |
4. Select the Requested By options from the drop down, for example, Administrator, Office staff, and so forth.
5. You can also send the forms to all the registered patient portal users by clicking Applicable for all Patients button. Further, you are provided with two more options of whether you want to send the selected forms to existing patients or/and future patients.
6. Click on Send.