The Continuity of Care Document (CCD) specification is an XML-based markup standard intended to specify the encoding, structure, and semantics of a patient summary clinical document for exchange.
To upload a CCD file:
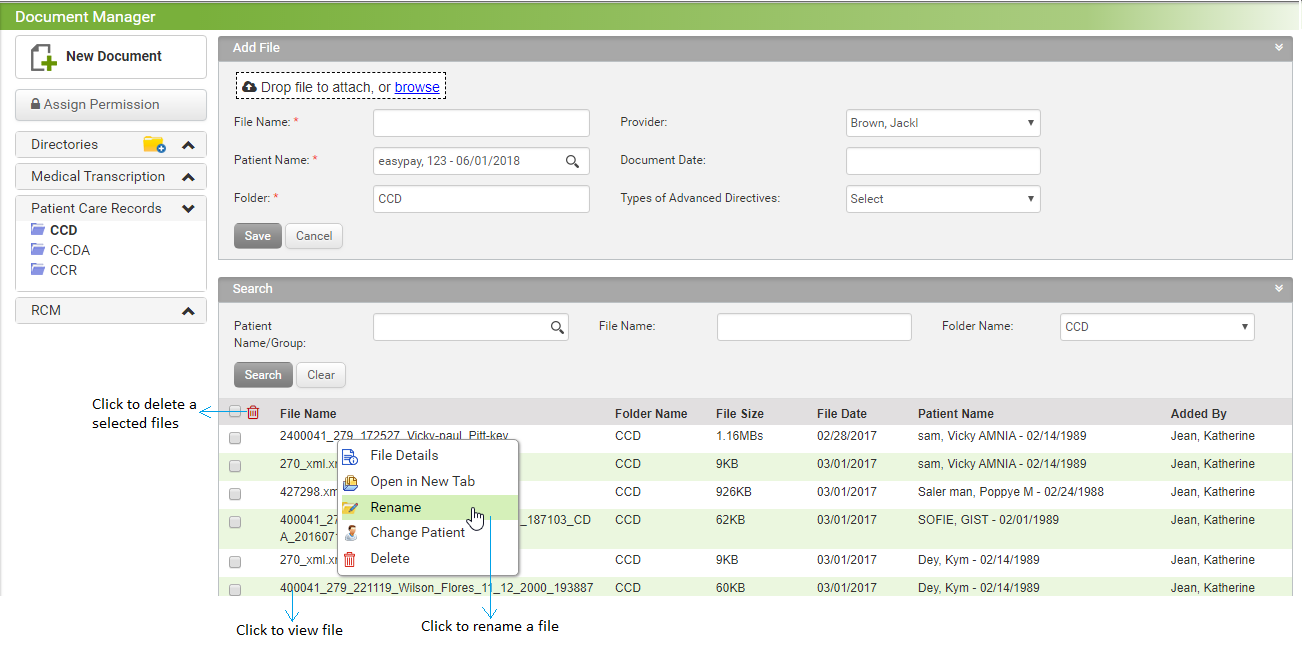
| 1. | On the Document Manager screen, click Patient Care Records. |
| 2. | From the folders listed, click CCD. The list of continuity care documents are displayed in the Document List section on the right side. |
| 3. | Start typing the patient name and select the patient from the list displayed, or select the patient by clicking the search icon  . . |
| 4. | Place the cursor on the Text field near File Name. The file name is updated with the name of the file uploaded. |
| 5. | To add a file do the following: |
| • | Click Browse to browse for the XML file that needs to be uploaded. |
| • | By default, the logged-in Provider is selected. |
| • | Enter or select the document date using the calendar icon. |
| • | Select the Type of Advanced Directives from the drop-down list. The options are: Living Will, Durable Power of Attorney, and DNR. |
| 6. | Click Save. The file is uploaded and added to the list below. |
| 7. | In the Document List section, do the following: |
| • | To rename the file, click the file name and select the Rename option from the list displayed.. |
| • | To delete the corresponding file, select the files and click the delete icon  . . |
| • | To change the patient, click the file name and choose the Change Patient option from the list. |
| • | Use the Search File option to search for a file. |
| • | To view the file in a user-readable format, click the File Name link from the list below. |
Similar to uploading the CCD documents into the system as shown above, you can upload the C-CDA and CCR documents.