Diagnosis is the act or process of identifying or determining the nature and cause of a disease or injury through evaluation of patient history, examination, and review of laboratory data. InSync supports recording both ICD-9 and ICD-10 codes in the system. You must configure the Coding Standard as either ICD-9 or ICD-9/ICD-10 in practice defaults to record the relevant ICD codes in the system.
To record the diagnosis (illness or ICD) codes:
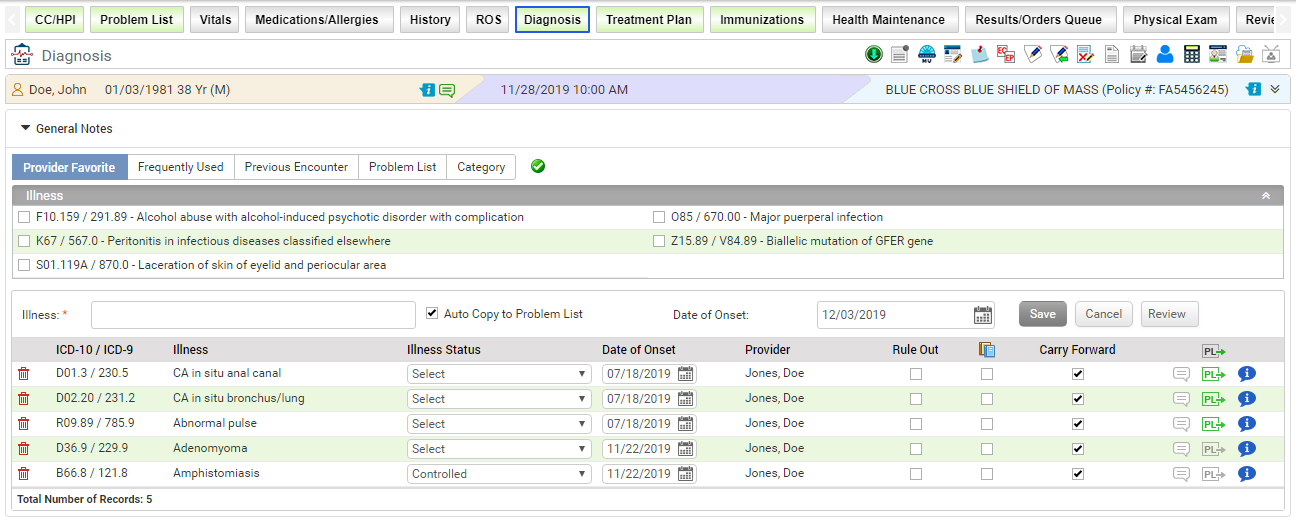
| 1. | In the charting elements ribbon, click Diagnosis. |
| 2. | You can select or enter the illnesses in different ways: |
| • | By default, the provider favorite list is displayed in the expanded mode. The provider favorite list can be configured from the Administration section. Select appropriate Illness(es) from the list. |
| • | To select the illnesses from frequently used illnesses, click the Frequently Used panel to expand it. |
| • | To select the illnesses that were used in previous encounters, click the Previous Encounter panel to expand it. |
| • | To select the illnesses from the problem list section, click the Problem List panel to expand it. |
| • | The Category panel has a list of various illness categories that are Low Back, Neck, Mid Back, and so forth. Expand the panel and click in a specific category to select illnesses corresponding to that category. |
| • | To search a specific illness, start typing few letters in the Illness field. A list of illnesses appears to select one from the list. |
| 3. | All the recorded illnesses will appear in the grid. Do the following: |
| • | To export the illnesses to the problem list, click the problem list icon  . . |
| • | To delete any specific illness, click the Delete icon  next to the illness. next to the illness. |
| • | Select the illness status from the drop-down list and onset date using the calendar button. |
| • | The provider can select the rule out option to indicate that the selected illness may or may not be exist. |
| • | To enter notes for any specific illness, click the Notes link next to the illness. |
| • | To view the education material for illnesses, select appropriate check boxes from the right end and click the View button. The education material can be exported to PDF, printed, and provided to the patient as well. Providing education material will help in increasing numerator for “Core 13: Use clinically relevant information from Certified EHR Technology to identify patient-specific education resources and provide those resources to the patient” of MU-2. Please refer to the above section in Meaningful Use Stage – 2 User Guide for more details. |
| 4. | The user can add general notes regardless of any particular illness or common to all illnesses in the General Notes section at the top of the screen. Users can either type in the notes in the box provided or use the Macro button for inserting the notes. |
| • | To add a new macro or edit the existing macro, click the Configuration button. Once added or updated the macro, click Save. |
| • | To insert the note from the preconfigured macro, select appropriate macro name from the drop down list and click Insert. |
Notes:
| • | All modifications done to the illnesses with the Auto Copy to Problem List check box selected are also updated in the Problem List. |
| • | On clicking the Review button, your name will display as a reviewer, along with date and time. |