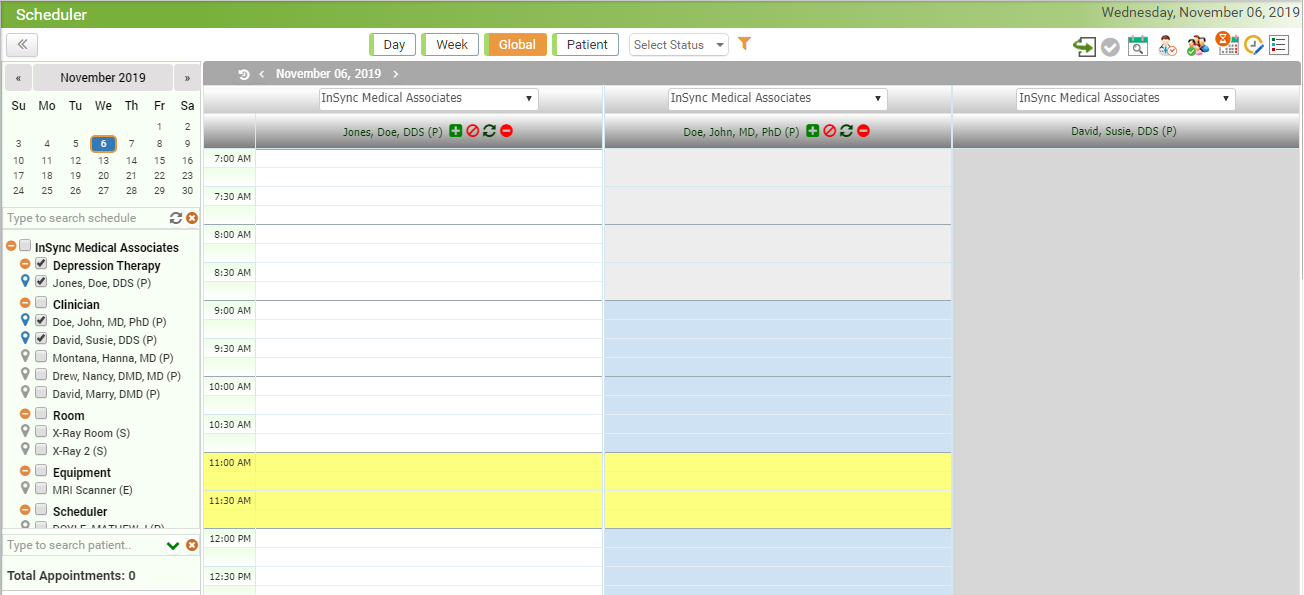
The Global mode displays schedulers of multiple resources at single time in the calendar layout for a quick overview.
To access the Global mode:
| 1. | From the Bookmarks pane on the left side, click the Scheduler icon  . . |
| 2. | Select the Calendar View and choose the Global mode from the top of the Scheduler screen. |
| 3. | Select one or more schedules. |
| 4. | By default, appointments booked for current date are displayed. Change the date, if required. |
| 5. | To access additional options for appointments (such as view Visit Details pop up, collect Copay, and so forth), click the respective appointment. |
| 8. | Drag and drop the appointment to desired time and resource to reschedule or move it. |
| 9. | To book new appointment, click on the blank slots or the  icon next to resource name. icon next to resource name. |
| 10. | To view Visit Details, Collect Copay, Start Encounter, and so forth, click the appointment. |
| 11. | To block certain time slots, click the  icon next to the resource name. icon next to the resource name. |
| 12. | To delete the schedule, click the  icon next to that resource name. icon next to that resource name. |
| 13. | To view copay details for the appointment, hover mouse over the Expected Copay  icon. icon. |
| 14. | To view complete list of appointments for all schedules, click the flip icon  . . |
| • | Schedule drop-down: Select Schedule from the drop-down for which you want to book an appointment. |
| • | Sort By: Select an appropriate option to sort the data by Schedule or Time. By default, the appointments will be sorted based on the Schedule option. Also, you can view the appointments of different schedules separated by red dotted line as shown in the below screen. |