Configuring Table Library

Contents
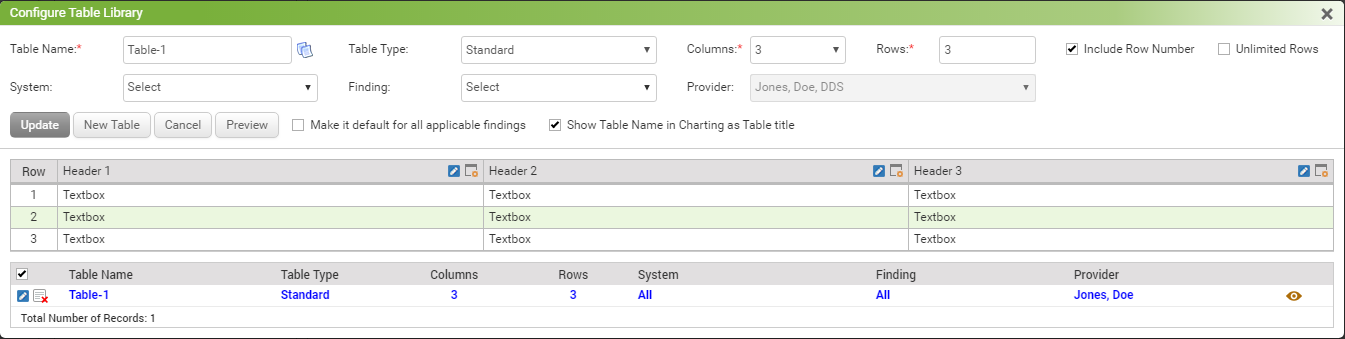
In the physical exam charting of the encounter note, providers can now create tables for cleaner data displays. A new Table icon ![]() is introduced on the Configure Physical Exam screen to create tables.
is introduced on the Configure Physical Exam screen to create tables.
Note: The Table icon also appears against each finding in the grid. You can create a table for each finding separately if you wish to do so.
Field |
Description |
Table Name |
Enter Table Name. It will appear as a title of the table in charting. Make sure the ‘Show Table Name in Charting as Table title’ check box is selected. Use the Copy icon |
Table Type |
Choose Table Type as Standard or Custom. Standard – This option will have a table header. Choose this option to create a typical table with number of columns and rows of your choice. In Standard table, each column will have same column type, i.e. column# 1 may have all text boxes, and column # 2 may have all drop downs, and so on. Custom - This option will not have a table header. Choose this option to create a free form table with number of columns and rows of your choice. In Custom table, you can place controls for each cell as per your requirement. For example, first cell in first row may have label and 2nd cell may have date control. You are free to place any control anywhere. |
Columns |
Select number of columns you want to have in a table. You can have maximum 12 columns in table. |
Rows |
Enter number of rows you want to have in a table. |
Include Row Number |
If you want to have a row number for each row, select this check box. |
Unlimited Rows |
When you select this check box, you will always have a last row blank in charting. Select this check box if you don’t know how many rows you will actually need when creating a table. |
System & Finding |
Select Systems and Findings from the drop down list for which you want to have the tables. |
Provider |
Select the providers from the drop down list who want to use the tables in charting. |
Make it default for all applicable findings |
You must select this check box to view this table in charting. If you don’t select this check box, it will be saved in your grid but you won’t be able to see it in charting. |
Show Table Name in Charting as Table title |
If you don’t want to show Table Name as title in your table, clear this check box. |
Preview |
Once saved the table, you can preview it to see how it would look in charting. The Preview icon is also available on extreme right side in grid. |