The Appointments report is generated with the list of appointments, based on the report filters selected. From the left menu items, click Reports > Scheduler > Appointments. The Appointments Report screen is displayed.
On the Appointments Report screen, the user can select from the following report filters:
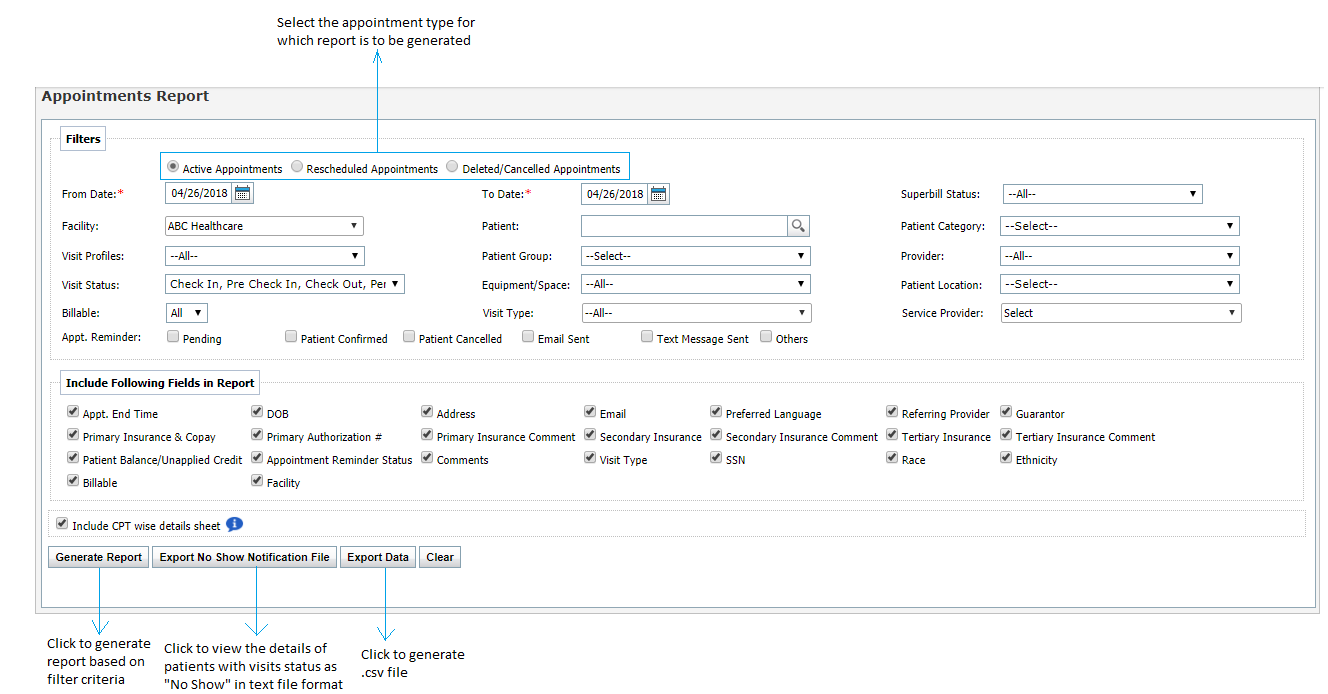
| 1. | Select the report type by selecting an appropriate option from Active Appointments, Rescheduled Appointments, and Deleted/Cancelled Appointments. By default, Active Appointments option is preselected. |
| 2. | Select From Date and To Date. |
| 3. | Select Superbill Status from the drop-down. |
| 4. | Select the one or more facilities for which you want to generate a report from the Facility drop-down. |
| 5. | Start typing the patient name in the Patient Name field and select from the smart search results. |
Note: This option is useful when a patient requests to view a list of all upcoming appointments.
| 6. | Select one or more patient categories from the Patient Category drop-down. |
| 7. | Select the Visit Profiles to include in the report. |
| 8. | Select the Patient Group to include in the report. |
| 9. | Select the Provider to include in the report. |
| 10. | Select the Visit Status to include in the report. |
| 11. | Select the Equipment/Space to include, if desired. |
| 12. | Select the Patient Location to include, if desired. |
| 13. | Select the Service Provider to include in the report. |
| 14. | Select the Billable status from the drop-down menu. |
| 15. | Select Visit Type for which you want to generate report from the drop-down list. |
| 16. | Select the Service Provider to include, if desired. |
| 17. | Select the check box(es) to include any Appointment Reminder(s). This option is available only for Active Appointments report type. |
| 18. | Select the 'Show only Telemedicine appointments' check box to show only telemedicine appointments in the report. |
| 19. | Select the check box(es) to include fields in the Report. You can view the ‘External MRN’ and ‘Patient Custom Fields’ details along with other details. |
| 20. | Select the 'Include CPT wise details sheet' check box when exporting data to include CPT associated with the appointment, Billable Amount, and Allowable Amount for each CPT in excel file. |
| 21. | Select the 'Include Claim details sheet' check box when exporting data to include Charges associated with appointment, Billable Amount, and Allowable Amount for each claim in excel file. |
| 22. | Select the 'Include Visit Status Time Tracker' check box when exporting data to include visit statuses associated with each appointment in excel file. |
| 23. | Click the “Generate Report” button to generate the report. |
| 24. | Click the “Export No Show Notification File” button, to view the details of the patients with visit status as “No Show” in text file (.txt) format. This option is available only for Active Appointments report type. |
| 25. | To generate the report as .csv file, click the “Export Data” button. This option is available only for Active and Deleted Appointments report types. |